What’s in the head? Metadata in HTML
HTML 文件的 head 是網頁在加載完畢之後,不會顯示在瀏覽器上的部分。其中包含一些資訊,如頁面的標題(<title>)、CSS 的連結 (當你想利用 CSS 來妝點你的頁面 HTML 時,你會用到它們)、網頁圖示(favicon)的連結,以及 metadata (裡頭承載了有關於該 HTML 的資料,如作者、描述該文件的關鍵詞等)。在這一章節裡,我們會討論以上的內容,甚至更多,藉此替你打下標記網頁的根基。
| 需求: | 對 HTML 的基礎認識,內容我們已在 HTML 入門中提及。 |
|---|---|
| 目標: | 學習 HTML 的 head,了解它的目的、它能包含什麼重要東西,以及它對 HTML 文件產生的影響。 |
什麼是 HTML head?
讓我們再看一次之前所看過的 HTML 文件:
<!doctype html>
<html>
  <head>
    <meta charset="utf-8" />
    <title>My test page</title>
  </head>
  <body>
    <p>This is my page</p>
  </body>
</html>
HTML 的 head 就是 <head> 元素裡面的內容 — 跟 <body> 元素中的內容不同(當網頁被載入瀏覽器中時,會呈現在頁面上),head 裡的內容不會顯示在頁面上,它的任務是要容納文件的 metadata (en-US)。在上例中,head 只有這樣:
<head>
  <meta charset="utf-8" />
  <title>My test page</title>
</head>
假如換作是較大型的網頁,head 裡面可能就會有非常多東西了。現在你可以先到幾個你常去的網站,並利用開發者工具 (en-US)來檢視它們的 head。我們在這裡並不打算要向你展示所有能放在 head 中的東西,而是教你使用一些常用的元素,讓你熟悉熟悉它們。總而言之,讓我們開始吧!
加入標題(title)
我們已經看到活生生的 <title> 元素了 — 這東西就是用來為文件加上標題的。你可能會把它跟 <h1> (en-US) 搞混,<h1> (en-US) 是用來為網頁主體加上標題的元素,有時也被叫做頁面標題 (page title),雖然聽起來功能很像,但他們是不同的東西!
<h1>(en-US) 元素在被載入瀏覽器時顯示在頁面上 — 通常它應該只會出現一次,用來為頁面內容加上標題 (如故事和新聞的標題,或是其他合適的用法)。<title>元素是用來代表 HTML 文件標題的 metadata (即非文件內容)。
不要光是看:檢視一個簡單的範例
- 在開始這次主動學習之前,請你先到我們的 GitHub repo 中下載一份 title-example.html page。要做到這件事情,你可以:
- 用你的文字編輯器開一個新檔案,並將原始碼複製到裡面,然後再儲存在一個合適的地方。
- 按下網頁上的 Raw 按鈕,它就會將原始碼以純文字的形式顯示在你瀏覽器的新分頁上。接著點按右鍵,將檔案儲存在你喜歡的地方。
-
現在在你的瀏覽器中開啟檔案,你看到的東西應該會長這樣:
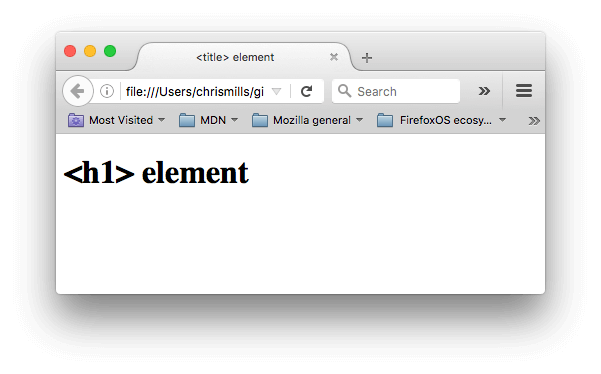 這樣子你應該可以很清楚地看到哪裡是
 <h1>,而哪裡是<title>了! - 試著開啟文字編輯器,修改兩元素的內容,儲存後再重整網頁,看看有什麼不同。
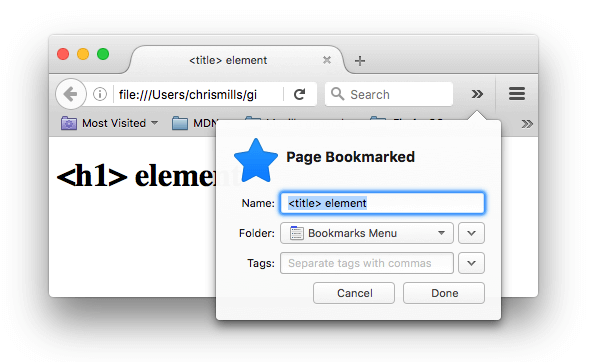
<title> 元素中的內容也被用在其他地方。舉個例子,如果你想要收藏這個網頁,(在 Firefox 上是 書籤 > 將本頁加入書籤 或按下 URL 列的星星符號),你就會看到 <title> 的內容被設為建議的書籤名稱。
接下來你就會看到,<title> 的內容也會被用在搜尋當中。
Metadata: <meta> 元素
Metadata is data that describes data, and HTML has an "official" way of adding metadata to a document — the <meta> (en-US) element. Of course, the other stuff we are talking about in this article could also be thought of as metadata too. There are a lot of different types of <meta> element that can be included in your page's <head>, but we won't try to explain them all at this stage, as it would just get too confusing. Instead, we'll explain a few things that you might commonly see, just to give you an idea.
指定文件字元編碼
In the example we saw above, this line was included:
<meta charset="utf-8" />
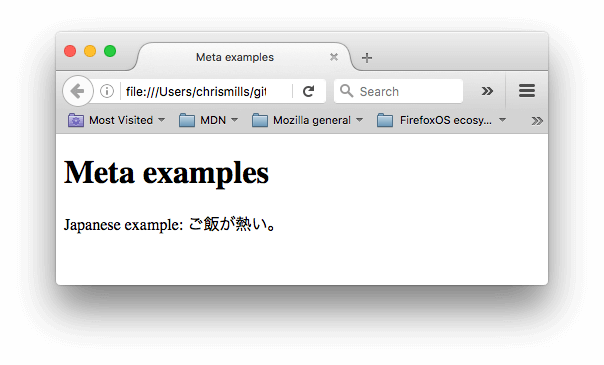
This element simply specifies the document's character encoding — the character set that the document is permitted to use. utf-8 is a universal character set that includes pretty much any character from any human language. This means that your web page will be able to handle displaying any language; it's therefore a good idea to set this on every web page you create! For example, your page could handle English and Japanese just fine:
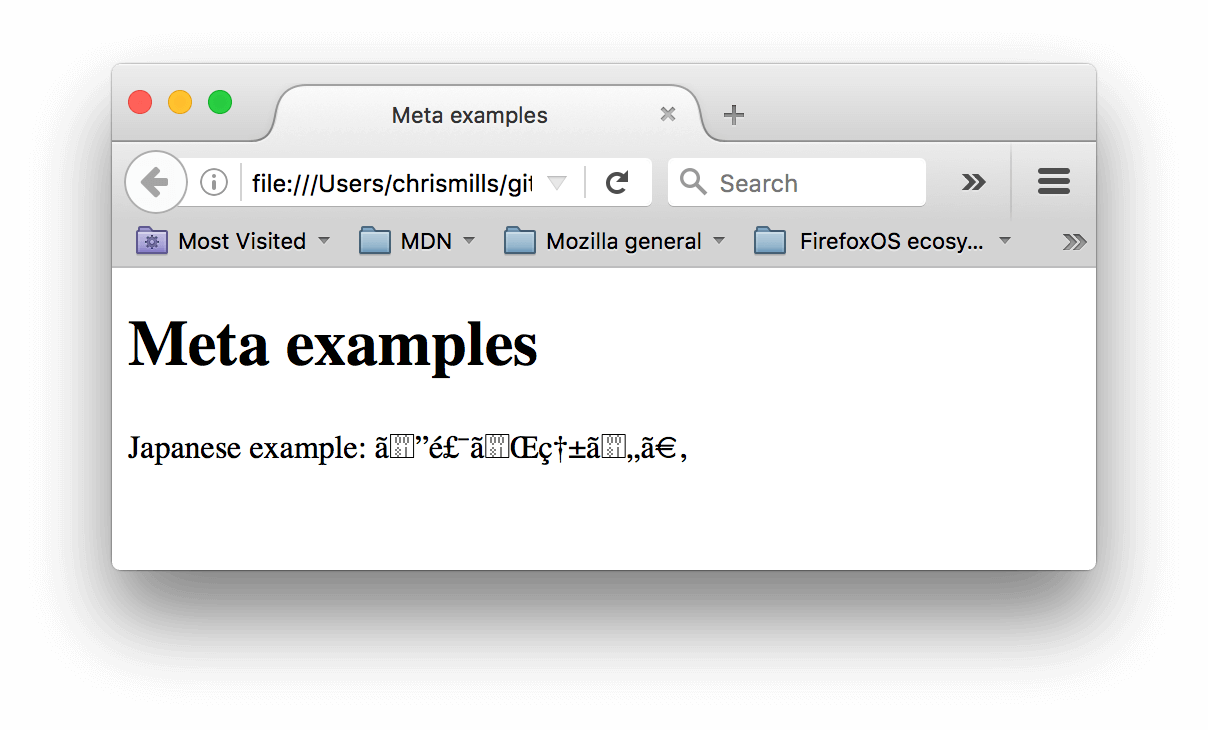
 If you set your character encoding to
 ISO-8859-1, for example (the character set for the Latin alphabet), your page rendering would be all messed up:
Active learning: Experiment with character encoding
To try this out, revisit the simple HTML template you obtained in the previous section on <title> (the title-example.html page), try changing the meta charset value to ISO-8859-1, and add the Japanese to your page. This is the code we used:
<p>Japanese example: ご飯が熱い。</p>
加入作者(author)和描述(description)
Many <meta> elements include name and content attributes:
namespecifies the type of meta element it is; what type of information it contains.contentspecifies the actual meta content.
Two such meta elements that are useful to include on your page define the author of the page, and provide a concise description of the page. Let's look at an example:
<meta name="author" content="Chris Mills" />
<meta
  name="description"
  content="The MDN Learning Area aims to provide
complete beginners to the Web with all they need to know to get
started with developing web sites and applications." />
Specifying an author is useful in a few ways: it is useful to be able to work out who wrote the page, if you want to contact them with questions about the content. Some content management systems have facilities to automatically extract page author information and make it available for such purposes.
Specifying a description that includes keywords relating to the content of your page is useful as it has the potential to make your page appear higher in relevant searches performed in search engines (such activities are termed Search Engine Optimization, or SEO.)
Active learning: The description's use in search engines
The description is also used on search engine result pages. Let's go through an exercise to explore this
- Go to the front page of The Mozilla Developer Network.
- View the page's source (Right/ Ctrl + click on the page, choose View Page Source from the context menu.)
- Find the description meta tag. It will look like this:
html
<meta name="description" content="The Mozilla Developer Network (MDN) provides information about Open Web technologies including HTML, CSS, and APIs for both Web sites and HTML5 Apps. It also documents Mozilla products, like Firefox OS." /> -
Now search for "Mozilla Developer Network" in your favorite search engine (We used Yahoo.) You'll notice the description
<meta>and<title>element content used in the search result — definitely worth having!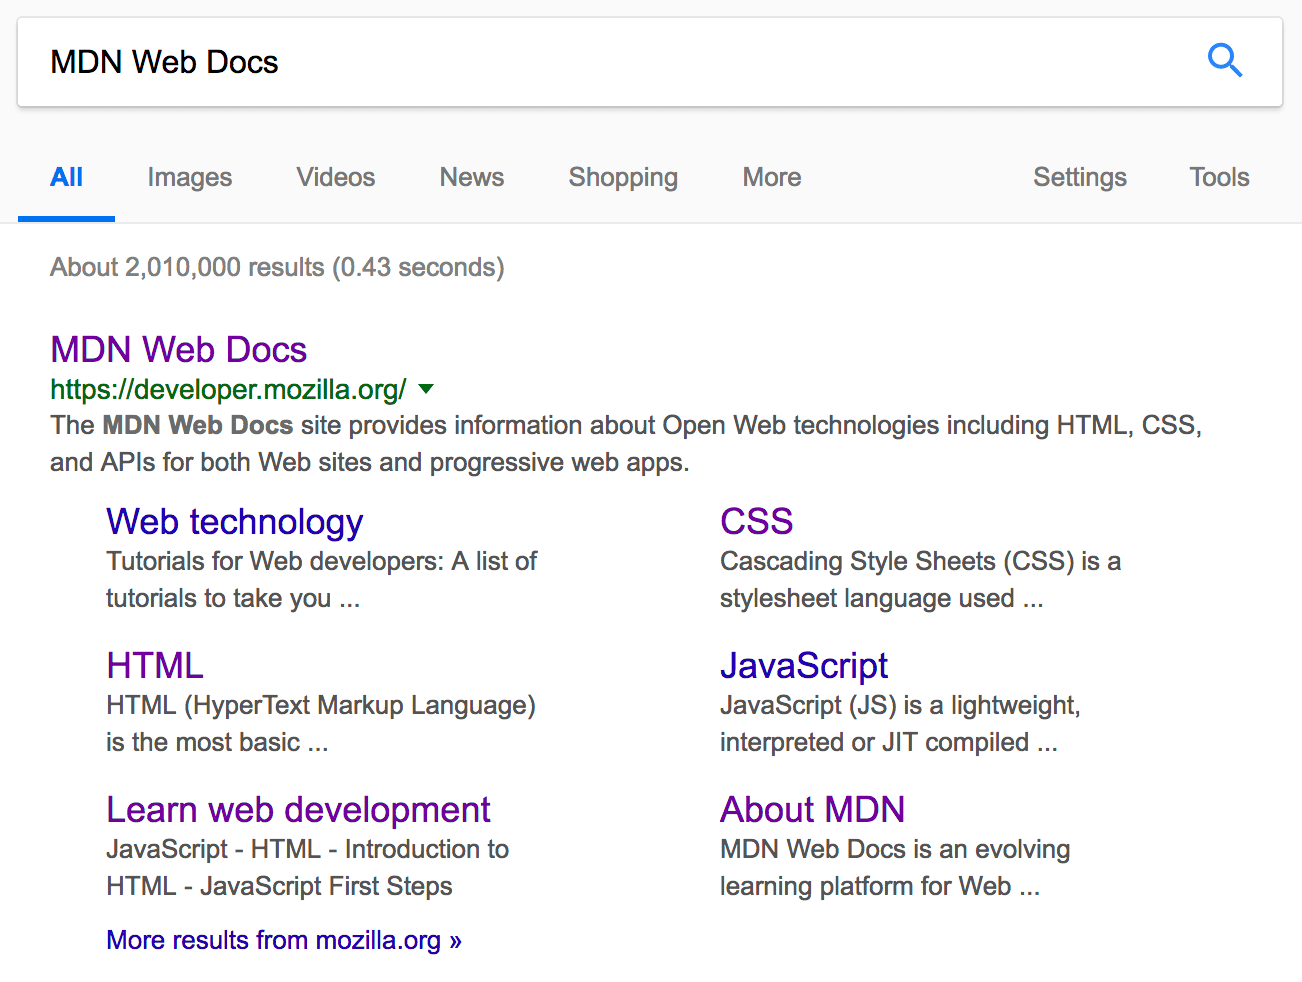
備註: In Google, you will see some relevant subpages of MDN listed below the main MDN homepage link — these are called sitelinks, and are configurable in Google's webmaster tools — a way to make your site's search results better in the Google search engine.
備註: Many <meta> features just aren't used any more. For example, the keyword <meta> element (<meta name="keywords" content="fill, in, your, keywords, here">) — which is supposed to provide keywords for search engines to determine relevance of that page for different search terms — is ignored by search engines, because spammers were just filling the keyword list with hundreds of keywords, biasing results.
其他種類的 metadata
As you travel around the web, you'll find other types of metadata, too. A lot of the features you'll see on websites are proprietary creations, designed to provide certain sites (such as social networking sites) with specific pieces of information they can use.
For example, Open Graph Data is a metadata protocol that Facebook invented to provide richer metadata for websites. In the MDN sourcecode, you'll find this:
<meta
  property="og:image"
  content="https://developer.mozilla.org/mdn-social-share.png" />
<meta
  property="og:description"
  content="The Mozilla Developer Network (MDN) provides
information about Open Web technologies including HTML, CSS, and APIs for both Web sites
and HTML5 Apps. It also documents Mozilla products, like Firefox OS." />
<meta property="og:title" content="Mozilla Developer Network" />
One effect of this is that when you link to MDN on facebook, the link appears along with an image and description: a richer experience for users.
 Twitter also has its own similar proprietary metadata, which has a similar effect when the site's URL is displayed on twitter.com. For example:
<meta name="twitter:title" content="Mozilla Developer Network" />
加入屬於自己的網頁 icon
To further enrich your site design, you can add references to custom icons in your metadata, and these will be displayed in certain contexts.
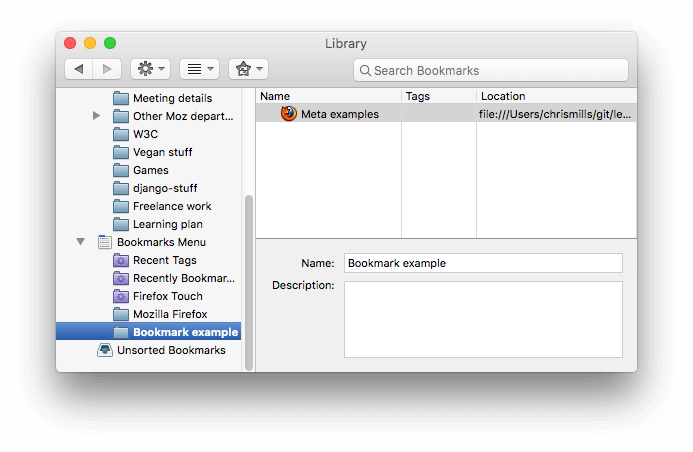
The humble favicon, which has been around for many years, was the first icon of this type, a 16 x 16 pixel icon used in multiple places. You'll see favicons displayed in the browser tab containing each open page, and next to bookmarked pages in the bookmarks panel.
A favicon can be added to your page by:
- Saving it in the same directory as the site's index page, saved in
.icoformat (most browsers will support favicons in more common formats like.gifor.png, but using the ICO format will ensure it works as far back as Internet Explorer 6.) - Adding the following line into your HTML
<head>to reference it:html<link rel="shortcut icon" href="favicon.ico" type="image/x-icon" />
Here is an example of a favicon in a bookmarks panel:
There are lots of other icon types to consider these days as well. For example, you'll find this in the source code of the MDN homepage:
<!-- third-generation iPad with high-resolution Retina display: -->
<link
  rel="apple-touch-icon-precomposed"
  sizes="144x144"
  href="https://developer.mozilla.org/static/img/favicon144.png" />
<!-- iPhone with high-resolution Retina display: -->
<link
  rel="apple-touch-icon-precomposed"
  sizes="114x114"
  href="https://developer.mozilla.org/static/img/favicon114.png" />
<!-- first- and second-generation iPad: -->
<link
  rel="apple-touch-icon-precomposed"
  sizes="72x72"
  href="https://developer.mozilla.org/static/img/favicon72.png" />
<!-- non-Retina iPhone, iPod Touch, and Android 2.1+ devices: -->
<link
  rel="apple-touch-icon-precomposed"
  href="https://developer.mozilla.org/static/img/favicon57.png" />
<!-- basic favicon -->
<link
  rel="shortcut icon"
  href="https://developer.mozilla.org/static/img/favicon32.png" />
The comments explain what each icon is used for — these elements cover things like providing a nice high resolution icon to use when the website is saved to an iPad's home screen.
Don't worry too much about implementing all these types of icon right now — this is a fairly advanced feature, and you won't be expected to have knowledge of this to progress through the course. The main purpose here is to let you know what such things are, in case you come across them while browsing other websites' source code.
在 HTML 中加入 CSS 和 JavaScript
Just about all websites you'll use in the modern day will employ CSS to make them look cool, and JavaScript to power interactive functionality, such as video players, maps, games, and more. These are most commonly applied to a web page using the <link> (en-US) element and the <script> element, respectively.
- The
<link>(en-US) element always goes inside the head of your document. This takes two attributes, rel="stylesheet", which indicates that it is the document's stylesheet, and href, which contains the path to the stylesheet file:html<link rel="stylesheet" href="my-css-file.css" /> - The
<script>element does not have to go in the head; in fact, often it is better to put it at the bottom of the document body (just before the closing</body>tag), to make sure that all the HTML content has been read by the browser before it tries to apply JavaScript to it (if JavaScript tries to access an element that doesn't yet exist, the browser will throw an error.)Note: Thehtml<script src="my-js-file.js"></script><script>element may look like an empty element, but it's not, and so needs a closing tag. Instead of pointing to an external script file, you can also choose to put your script inside the<script>element.
Active learning: applying CSS and JavaScript to a page
- To start this active learning, grab a copy of our meta-example.html, script.js and style.css files, and save them on your local computer in the same directory. Make sure they are saved with the correct names and file extensions.
- Open the HTML file in both your browser, and your text editor.
- By following the information given above, add
<link>(en-US) and<script>elements to your HTML, so that your CSS and JavaScript are applied to your HTML.
If done correctly, when you save your HTML and refresh your browser you'll see that things have changed:
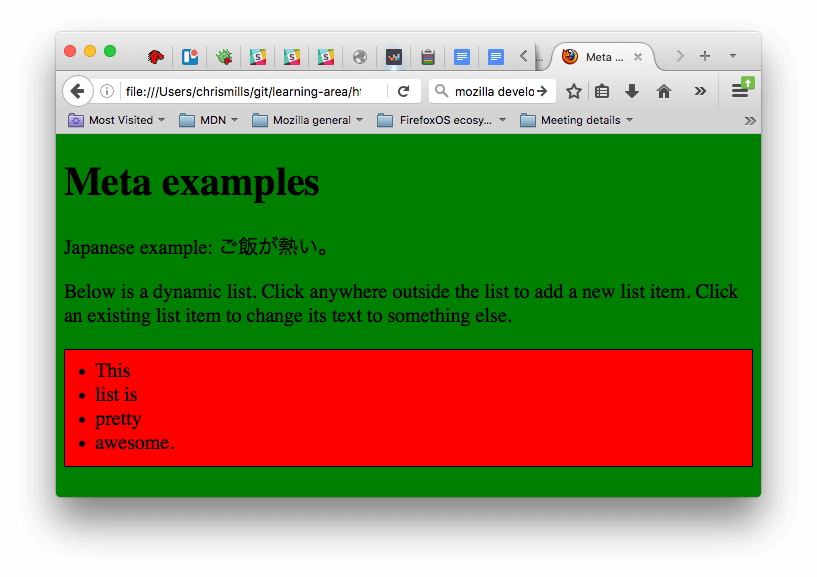
- The JavaScript has added an empty list to the page. Now when you click anywhere on the list, a dialog box will pop up asking you to enter some text for a new list item. when you press the OK button, a new list item will be added to the list containing the text. When you click on an existing list item, a dialog box will pop up allowing you to change the item's text.
- The CSS has caused the background to go green, and the text to become bigger. It has also styled some of the content that the JavaScript has added to the page (the red bar with the black border is the styling the CSS has added to the JS-generated list.)
備註: If you get stuck in this exercise and can't get the CSS/JS to apply, try checking out our css-and-js.html example page.
預設文件語言
Finally, it's worth mentioning that you can (and really should) set the language of your page. This can be done by adding the lang attribute (en-US) to the opening HTML tag (as seen in the meta-example.html and shown below.)
<html lang="en-US">
  …
</html>
This is useful in many ways. Your HTML document will be indexed more effectively by search engines if its language is set (allowing it to appear correctly in language-specific results, for example), and it is useful to people with visual impairments using screen readers (for example, the word "six" exists in both French and English, but is pronounced differently.)
You can also set subsections of your document to be recognised as different languages. For example, we could set our Japanese language section to be recognised as Japanese, like so:
<p>Japanese example: <span lang="jp">ご飯が熱い。</span>.</p>
These codes are defined by the ISO 639-1 standard. You can find more about them in Language tags in HTML and XML.
總結
That marks the end of our quickfire tour of the HTML head — there's a lot more you can do in here, but an exhaustive tour would be boring and confusing at this stage, and we just wanted to give you an idea of the most common things you'll find in there for now! In the next article we'll be looking at HTML text fundamentals.